Since the article launched, I’ve been getting a lot of questions regarding why I used ProRes instead of the REDRAW, and how to handoff the edit to finishing. I felt I had to answer these commonly asked question.
Why not REDRAW? As much as I would love to use the workflow that has been demonstrated a million times by FCPWorks, I cannot for the life of me get it to playback smoothly on my iMac 5k retina nor on my MacBook Pro Retina. And as much as I would like to use ProRes Proxy from the REDRAW, I’m worried about corrupting the HDD (even though I have more than one backup). Also, I feel like I’m burning cash for storage. I have written an article on Replacing ProRes with R3D in FCPX as my workaround.
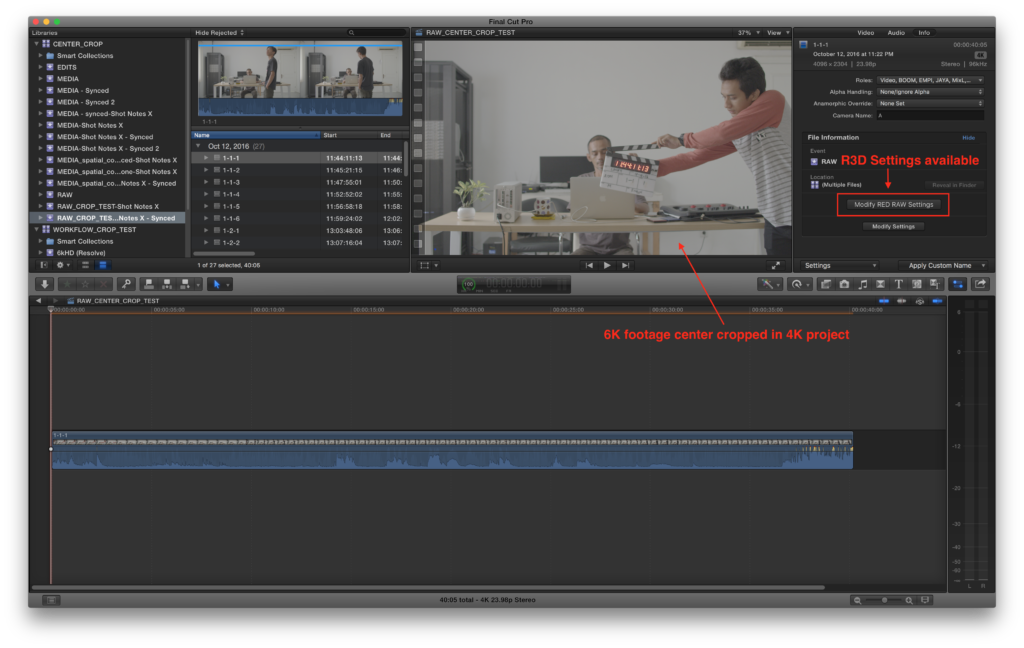
However, if you want to use the REDRAW directly in FCPX, the same principals as can be applied to the REDRAW footage. In my case, my REDRAW footage was 6K HD (5568×3132) and I set my timeline to the 4K center extraction at 4096×2304. Viola! fits like a glove. So for all of you who prefer to work using the workflow that FCPWorks demonstrated years ago (and render to ProRes Proxy if necessary), know that you are in good hands and can use the formulation of this workflow to scale it accordingly. I’m gonna go out on a limb and say that I’m confident we can apply the workflow to other camera systems.
FCPX 6K HD REDRAW with 4K Center Extraction
Which brings us to the big question? How do I handoff the edit to finishing? Well, this all depends on your workflow. Aspects of Ratio was a test for a upcoming feature workflow (title of which I cannot disclose yet). The production has been given a strict delivery requirements for OTT. The DoP on that production asked me to help him figure out the specs. I asked him who will be involved and it turns out that the production will be going through a FCPX – Resolve – Nuke – ProTools workflow combination. Therefore, I had to figure out how to help the team setup the 6k to 5k Center Extraction settings in the other software, as well as get the sound the ProTools.
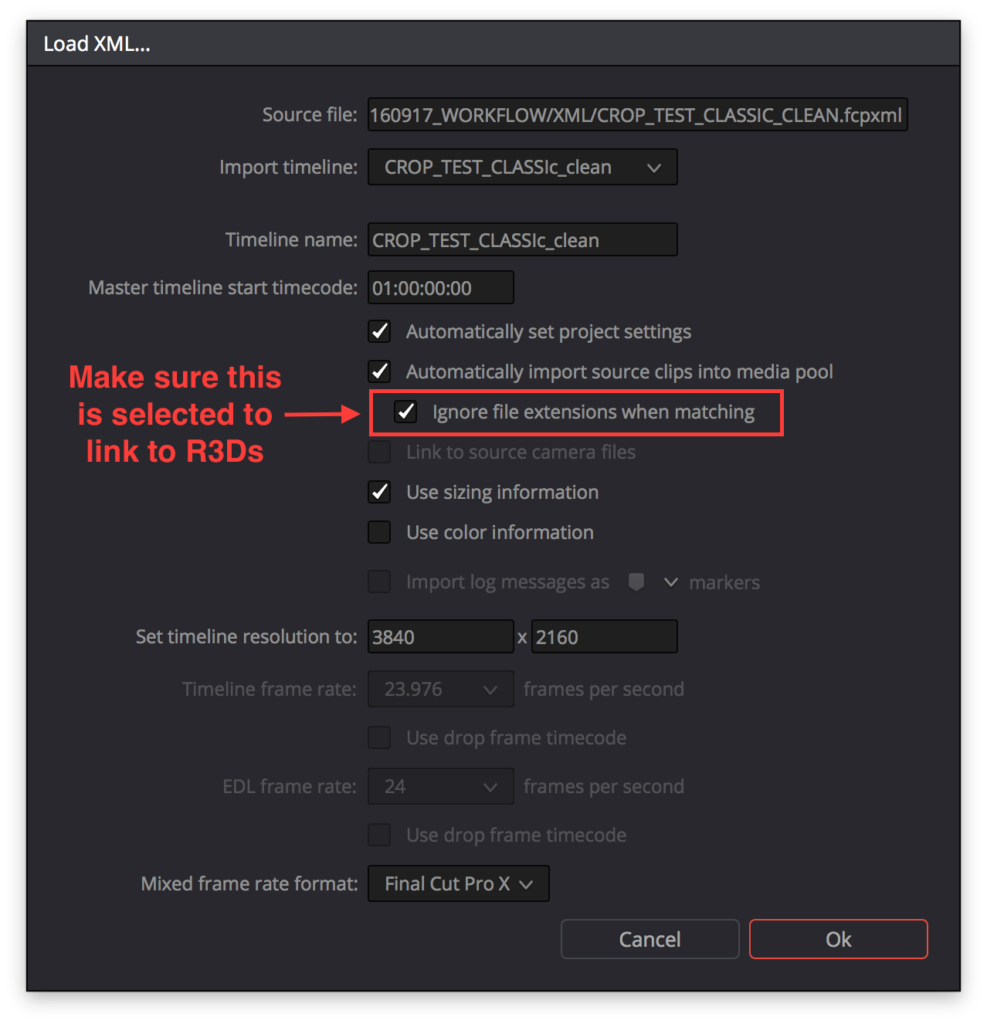
Getting the edit to Resolve was very straightforward. But the center crop was not happening immediately upon import.
How to get the center extraction to work in Resolve? The settings was the thing that tripped me. After fidling all the settings, I found it in the bottom part of Image Scaling. I needed to set the Input Scaling Preset and Output Scaling Preset to Center crop with no Resizing.
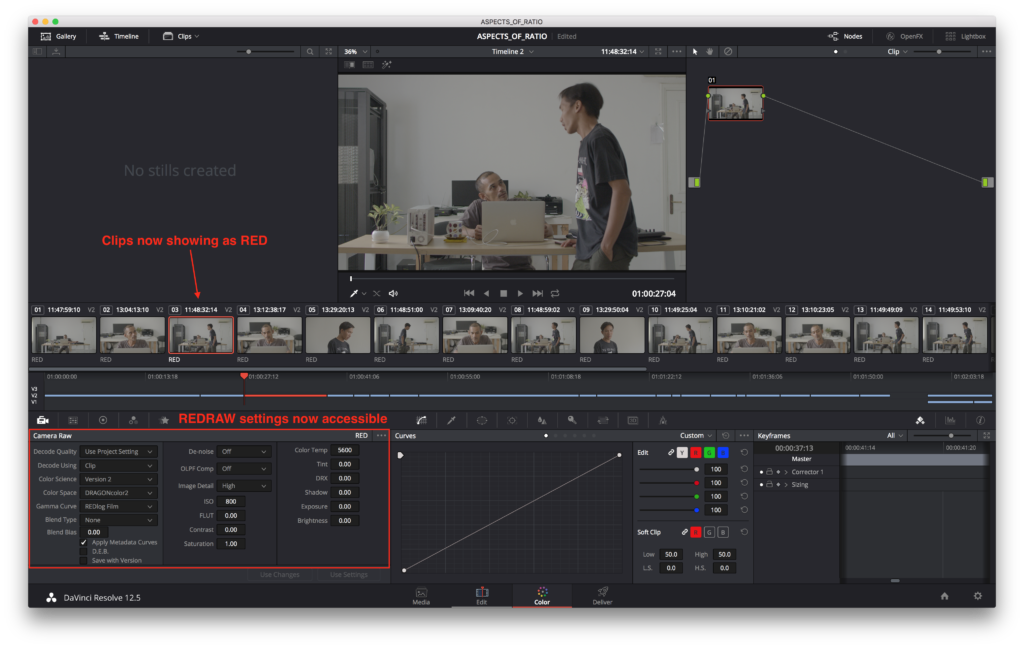
The other thing was to figure out how to get to the RAW settings in Color section since it wasn’t accesible. Resolve saw the sync-ed clips are a compound clip.
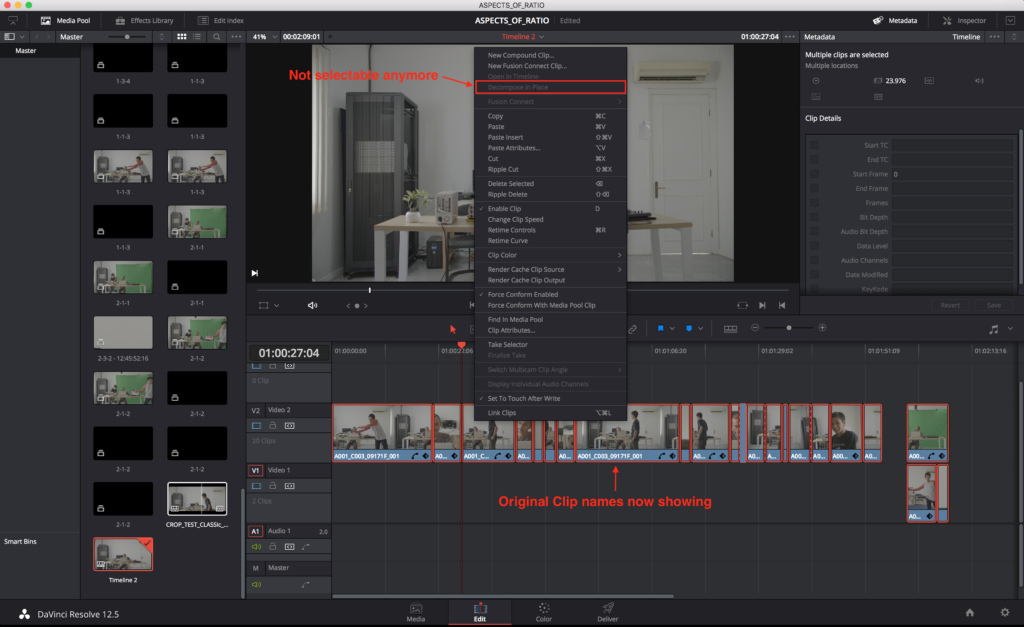
Compound clips cannot Access REDRAW settings
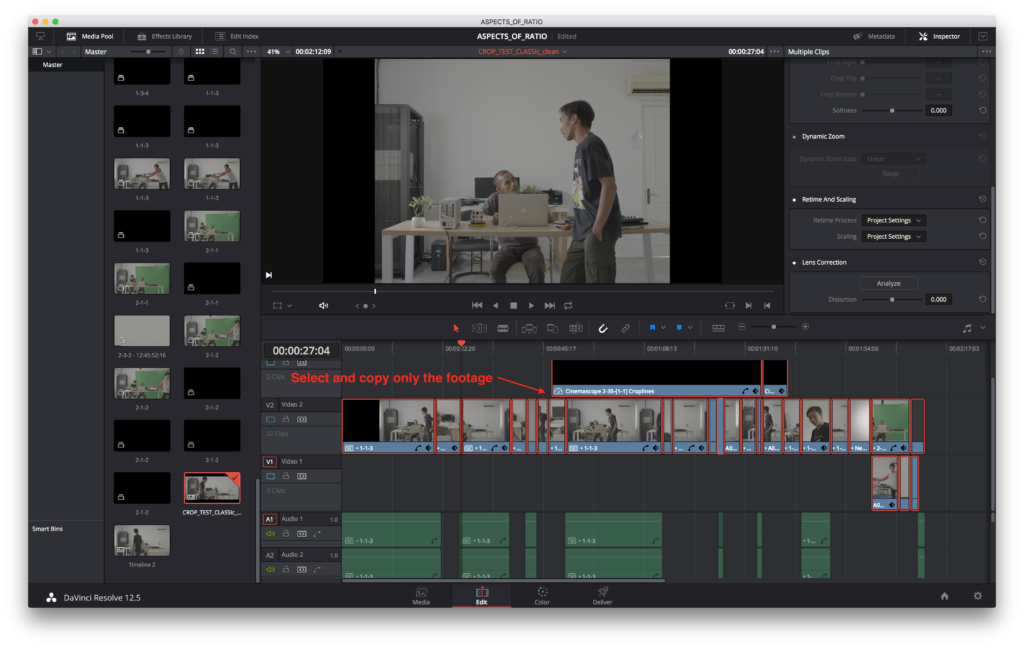
In the Edit section, all the clips had to be Decomposed. I first removed the graphics and logo. I then Select All the clips on the timeline, Right Click, Decompose in Place.
I had to do it a couple of times before the RED clip names showed up (you’ll know when the Decompose in Place is greyed out).
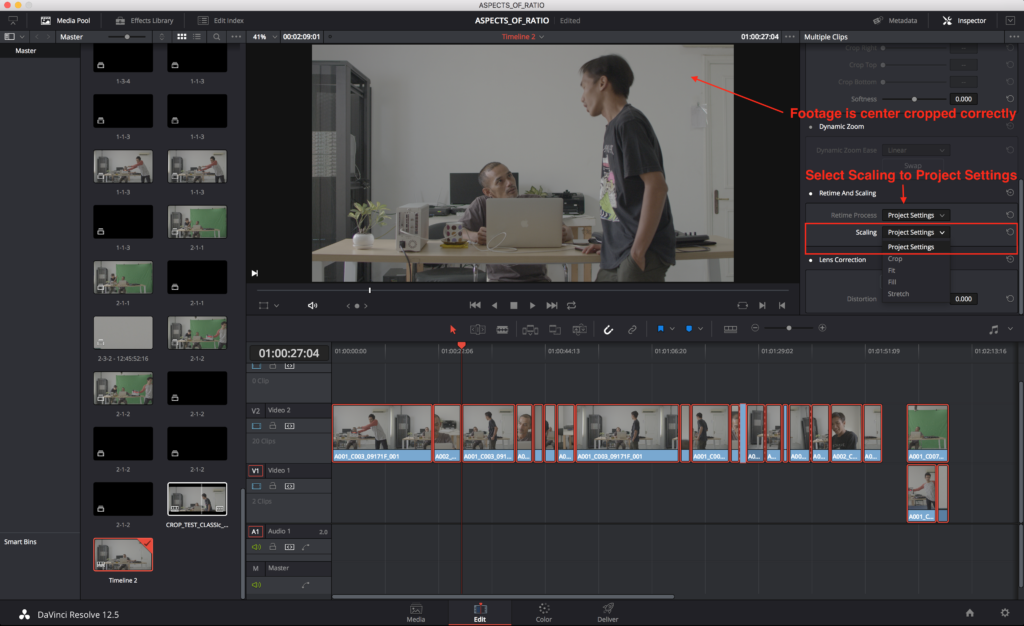
Then, I had to select all the footage, go to Metadata, scroll down to Scaling and set to Project Settings.
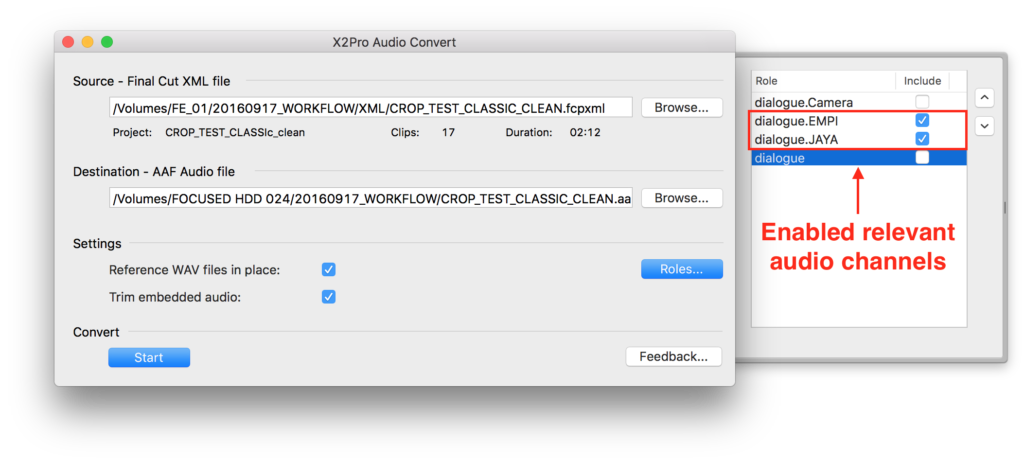
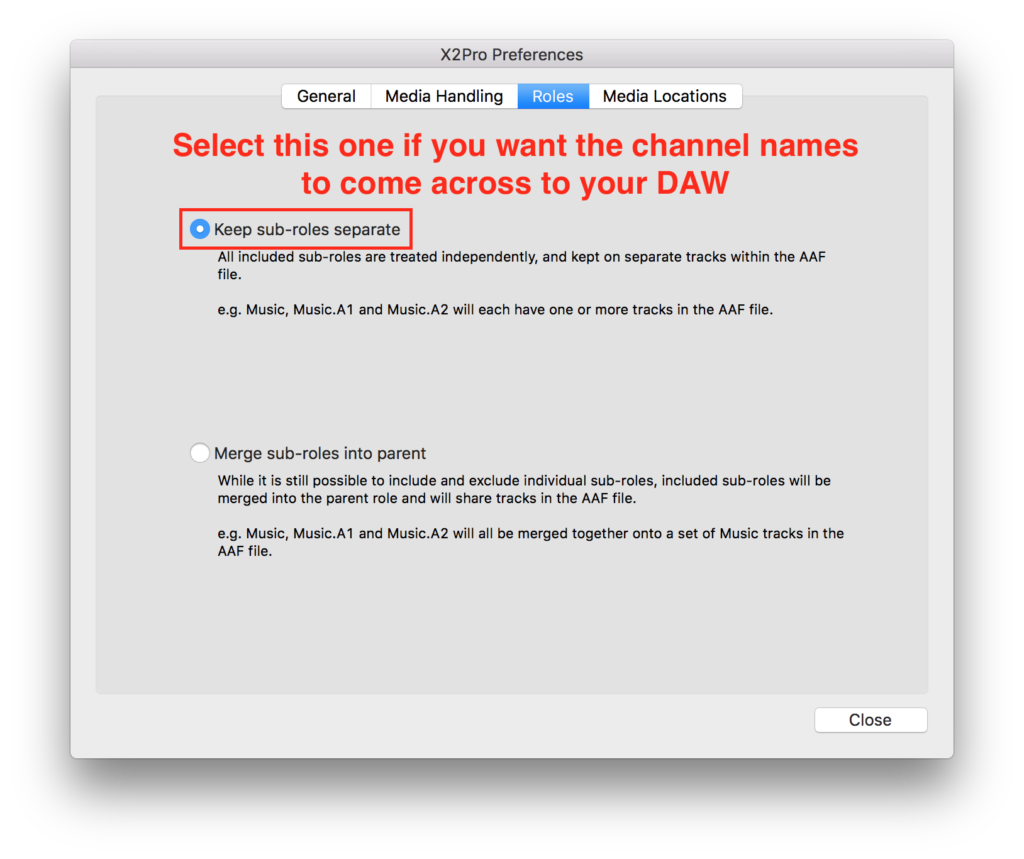
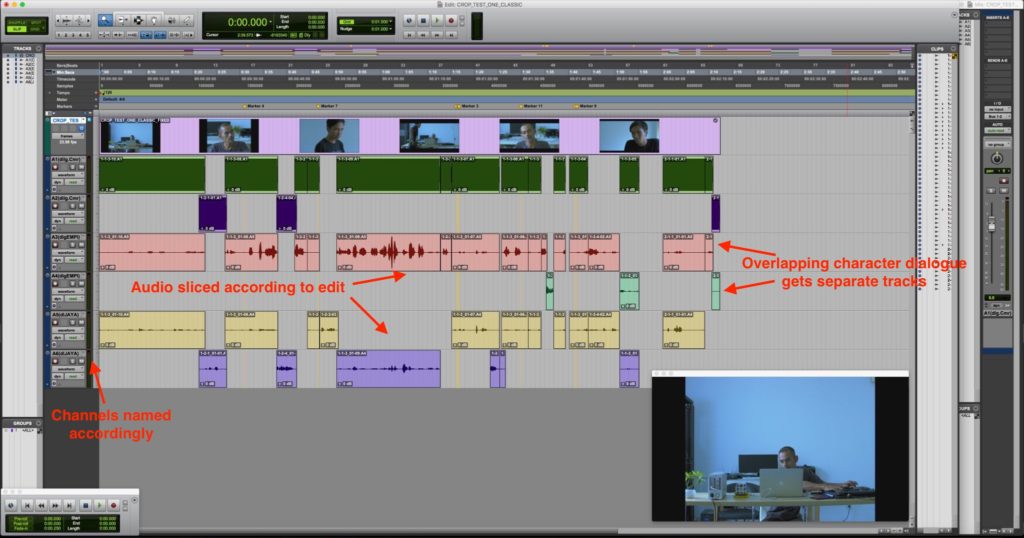
While the picture was being graded, I had to send out the audio to the mixer who was using ProTools. Using X2Pro, I was able to send the timeline with all the metadata. I also made a ProRes Proxy of the timeline for the movie reference.
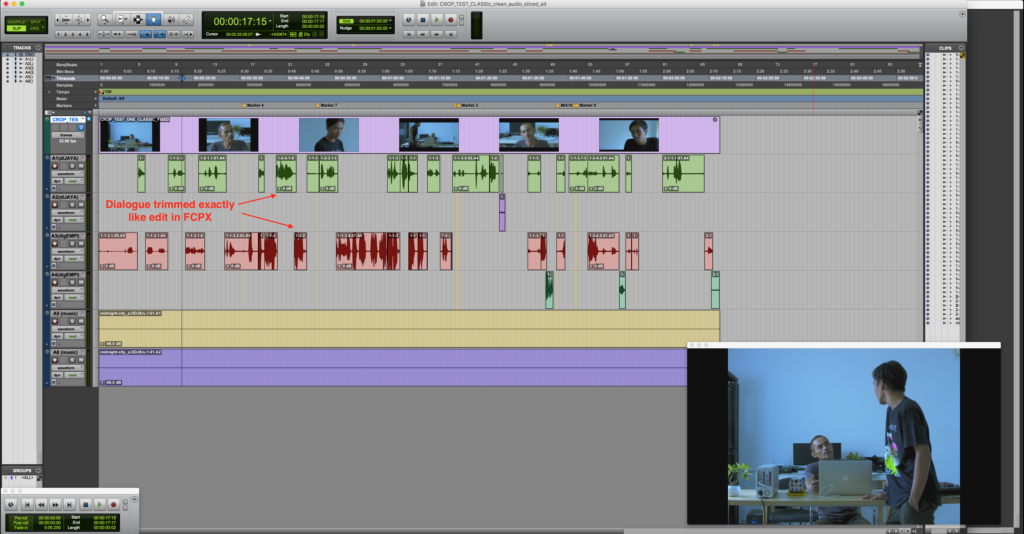
When the session was made in ProTools, the tracks are named according to characters on screen and the music was in the bottom. However, there were more bigger chunks of sound slices than I would like since I already did a sound edit in FCPX.
I reached out to Mike Matzdorff since his book was my bible for the remainder of the workflow. After a lot of back and forth, apparently the thing I had hoped X2Pro would do is not a feature than exists yet. I encourage you to contact X2Pro at this link and chime in for it to be a feature in their app. I’m sure your Sound Mixer will love you for it.
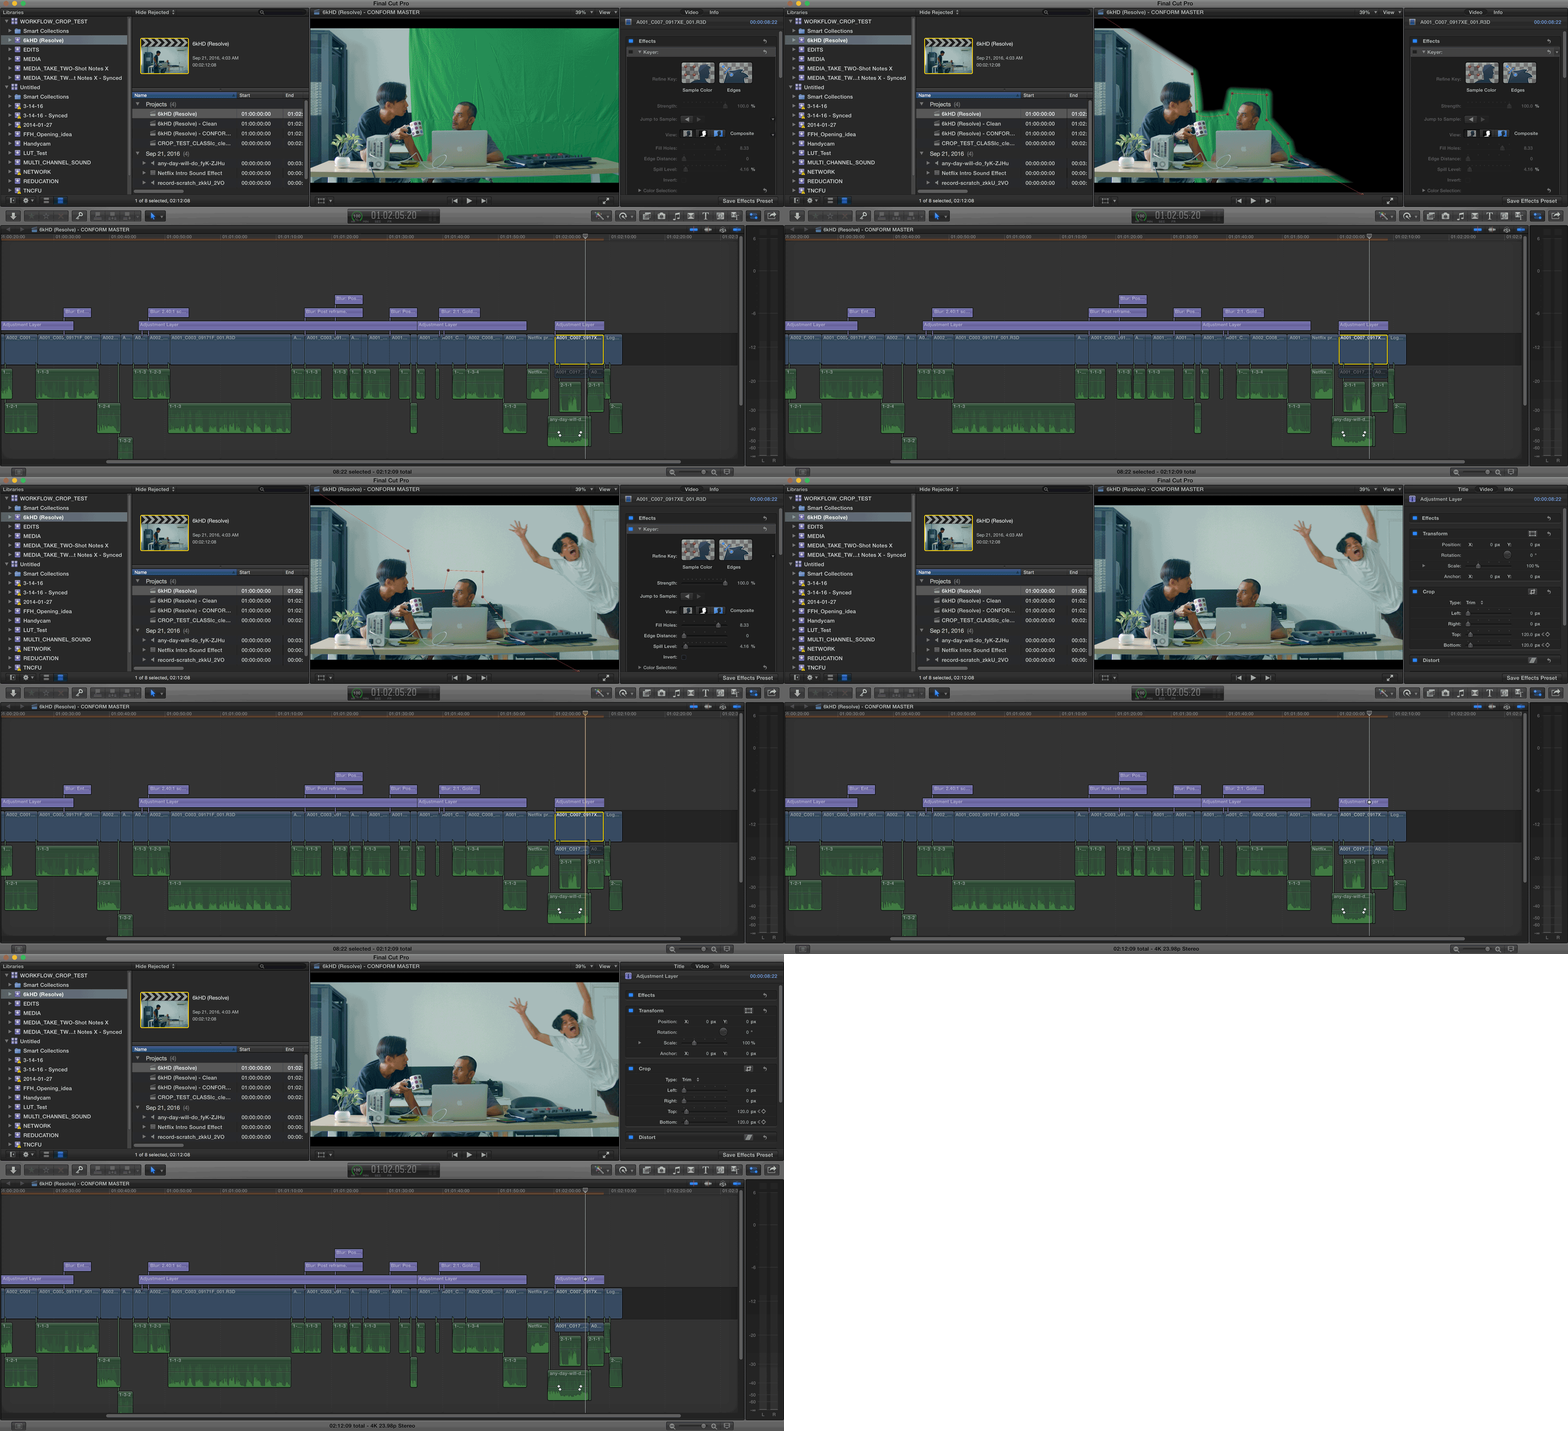
Ironically, our mixer was sick and I suck at ProTools so I ended up mixing in FCPX as best I can. The graded footage was roundtripped back in FCPX. Since I only had one VFX shot, I quickly composited the shot using the standard keyer combined with the masking tool then mastered the video.
Although this wasn’t quite the workflow as needed for the feature project, I think the logic is to bring the footage into Nuke would be after a neutral grade in Resolve (unless of course the compositor is comfortable working directly with the R3Ds). Final conform should be done in Resolve, Baselight, Pablo, or Flame if you can afford it.
I hope that covers any concerns of the follow through to this workflow.

