No, I’m not working on a David Fincher film (I wish :D). Now that I got that out of the way, why title an article this way. Simple, I want to be able to edit in FCPX with the benefits of shooting overscan and cropping center extraction. Ever since I saw the behind the scenes of Girl with the Dragon Tattoo, I was trying to figure out how to do it. I then saw Michael Cioni’s explanation of Ender’s Game case study, same technique but using AVID. Finally, after seeing Gone Girl and the infamous Adobe workflow, my curiousity peaked. This workflow works on the other NLEs, why can’t it be done on FCPX?
So my team and I devised a short video about aspect ratio entitled Aspects of Ratio. We shot on the RED WEAPON 6K with jam-synced audio using Sound Devices 633:

It looks like a simple exercise but the work behind it had a lot of R&D. First, I had to figure out how to get the resolution right for the timeline. That meant reverse engineering the resolution from the capture settings. I reached out the Tyler Nelson (the assistant editor on David Fincher’s films) and asked him how he calculated the resolution for the ProResLT to it fit perfectly into the timeline:
I thanked him for first for friending me and then thanked him for the formulation. When I had that as a basis, I then had to do my own calculations for 16×9 because he was working with at 6K 2:1 capture aspect ratio with 5k 2.4:1 center extraction. Since I was delivering in a 16×9 format, I used the 6K HD setting on the camera (5568×3132) and the center extraction for 5K was 5120×2880 (about 8.75%). I felt that this wasn’t enough a buffer for it to helpful in post since Tyler’s settings gave him a 20% buffer. I decided to do a 4K center extraction at 4096×2304 and got a whopping 35.9% look around.


Now I had to calculate the ProResLT for the rushes. Since I wanted to edit in a 1080p timeline, the ProRes renders had to be bigger than the Viewer window. Since I already knew I had a 35.9% buffer, I added that to 1920×1080 which became 2610×1468. I then imported the footage into FCPX and set the project to 1080p. I put into the timeline then… it didn’t work?!?

This can’t be right. I mean, the formula should’ve worked. I wanted to make sure I didn’t screw this up so I tested in Premiere Pro. The result flawless.

So, if it works on Premiere Pro, then my render settings are all good. Just need to figure out why FCPX isn’t doing this. I went through each video setting. First I thought it was because it wasn’t scaled, so I scaled the footage 135.9%. The framing was perfect.

However, this still seemed wrong to me. Why are we scaling a footage that is already scaled in proportion to the timeline? There must be another setting I’m not looking at correctly. I tried the combination of Scale, Crop and Distort parameters and it still didn’t give me the automatic center crop in timeline. I was losing hope. Only parameter left I haven’t touched is Spatial Conform. I tried Fill which didn’t do anything. Then, I tried None and BAM! the Viewer showed a scaled pic of the frame.

I immediately reset all the other parameters and viola! Center Extracted 16×9 footage in a 1080p timeline.

I selected all the footage in my event and changed the Spatial Conform to None and I was flying.

<
All the footage was cropped in Viewer as per the Frame Guide we used when we shot.
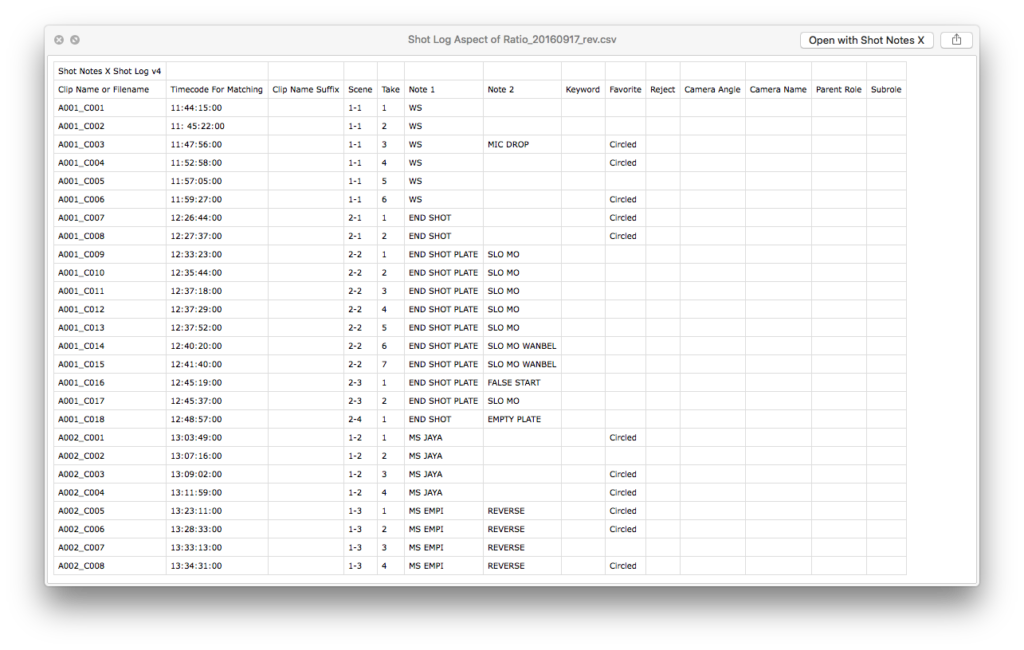
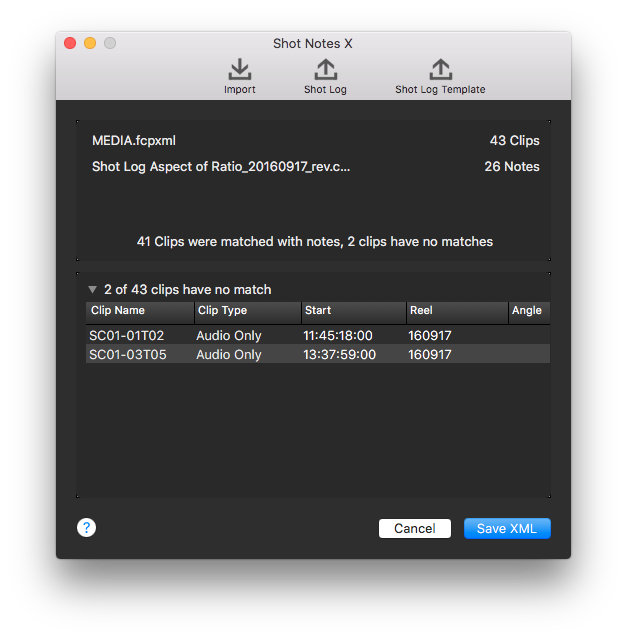
Now comes the fun part. I love FCPX because of the power of metadata. So we imported our sound into the event and XML the event out. Next, we used Shot Notes X to conform the metadata to all the media.


…and then used Sync-N-Link X to sync all the footage.


There you have it. Ready to edit Fincher style with the metadata power of FCPX. The only problem I found is that you must set Spatial Conform to None before conforming the FCPXML using Sync-N-Link X. Otherwise, the footage will not crop in the viewer. I’m not sure if this is a bug or something that happens with the XML. Hope this helps.


